Thursday, February 23, 2012

Camping Satchel

 We had a birthday party at our house, and made these quick and easy satchels to go along with our camping birthday theme.
 It was the perfect size for holding our little party favors.
 It has a pocket on the back.


I love gathered fabric... it looks so cute on the front of this bag.

I also have never done the freezer paper paint, but tried it out with this project... 
it was a very quick and easy way to personalize the bags. 

I won't lie... I really love to look at them.

I really think it turned out so cute.

Here they are.
All lined up and ready to be handed out at the party.

So, if the lil' person in your house needs a satchel to tote around treasures...

Craft. Me. This.


Satchel Tutorials: 
and 

Monday, February 20, 2012

Heart Hand Warmers

These were the hand warmers that we made for a teacher gift.
At the preschool the kids are able to go and play outside in a little play area everyday.
Unless it is raining or below 25ยบ.
So that means these poor teachers have to stand outside with them an monitor them.
So, when I saw this clever idea all over pinterest I knew it was the perfect Valentine gift for our preschool teachers. 

On the back it said,
"You warm my heart"
with heating instructions (30-60 secs in the mic)
It was a quick and easy Valentine to whip up to show the teachers how much we appreciate them.

Even though Valentine's Day has come and gone, these still are a fun gift idea to give for no reason at all... or to make for yourself to keep your hands warm.
So if you want a warm heart and warm hands...

Craft. Me. This.

Best tutorial I've seen: Heart-Warmer

Thursday, January 26, 2012

Easy Flannel Quilt


I saw this easy flannel "quilt" on pinterest and knew it was something I wanted to tackle.
With a little of help I got it made just in time for my brand new baby boy.

I ended up making it a little different than the tutorial, but still think it turned out cute. 
I made mine 40"x40"  with 4" squares, spaced an inch apart. There ended up being a seven row grid. I love the way it turned out, and I'm glad I made it a little bigger than the tutorial, because the flannel shrunk quite a bit after I washed and dried it.

For my squares I bought 12" pieces of fabric to work with... I really only needed 4" (or 5" to correct poor cutting jobs), so I was able to use the extra to get some matching burb clothes.

This quilt could easily be started and finished in a day.
So go on and give one a try.

Craft. Me. This.

Tutorial link HERE.

Special thank you to my Mom and Roberta for helping with these projects.

Monday, January 2, 2012

Sibling Hospital Surprise

We are expecting a baby brother at our house any day now.
I saw an idea for a sibling hospital gift and knew I had to jump on that train.

So when the girls come to visit their new baby brother these will be waiting for them.
They are made from sewing together a placemat from the dollar store. It was a really quick and easy thing to do, and I just used some thick ribbon for the handles.  

Here is what each kiddo is getting:
The younger sibling...
I did make the I Spy bags, I found the pencil case on clearance at target for like $0.28, it didn't have the plastic part on it, so I added it, took out the zipper and sewed in some ric-rac instead. 
It was fun and simple.

and the older sibling
The notebook is a composition book covered in paper (and 'laminated' with packaging tape), I was going to add her name... but got lazy and figured she wouldn't care. 

I also thought it would be fun to make some diapers for my girls baby dolls so that they could learn how to change a diaper, and feel a little more involved with taking care of baby brother.

It is kind of weird because our babies don't lose their clothes, but I don't think that will stop the girls from changing diapers over and over again.

Of course the baby would also need some wipes and a bottle to eat from, so we included that too.
The wipes container is an old Cottenelle Flushable wipes. Perfect size for pretend play.
I was wondering what I was going to put this all in, and had a surprise quilt show up at my house from a dear friend that also included some lined drawstring bags (thank you again Cathy!). 
It was the perfect size for holding all of the babies necessities.


Now... we just wait for baby brother to come to share these surprises with the girls!
Any. day. now.

In the meantime, you can feel free to...

Craft. Me. This.


Tutorials:
(I didn't really use a tutorial, and don't like the hot glued zipper, but this is an quick easy tutorial you could follow)
Pretend Wipes 
(I just cut out the flannel in a square and sewed around it... no need for a tutorial)

Friday, December 30, 2011

Wooden Peg Dolls

When I saw this idea for Princess dolls on a blog I knew I wanted to make some for my girls and nieces.
It was a lot of work, I'm not going to lie, but it was so fun to watch these little wooden figures come to life. 

Here is my princess set:
 Cinderella, Snow White, Rapunzel, Belle, Ariel, Sleeping Beauty

Here is the back view:

I also made a set of fairies, I just loved the short dresses, and they were just as fun to make.


I was originally going to make them look like the Tinkerbell characters... but got a little burnt out.

Here is the back so you can see their wings.


I also whipped up some fun little bags for them to be carried in.
It is just the right size for carrying around the dolls, it is around 4"x6"

And because Sarah is such a superhero fan, I couldn't resist making a set for her.
They were a lot of fun, maybe because I was a little burnt out on princesses...


They were lots of fun to make, so go on and try and make some for your little ones.

Craft. Me. This.

Princess Doll idea seen HERE
Superhero idea seen HERE
Lined Drawstring Bag tutorial found HERE (I cut dimensions in half)

Thursday, December 29, 2011

Car Cozy

My cute lil' nephew has become quite the lil' car addict. 
So when my SIL suggested I make a car cozy for him I jumped on the opportunity!


Now... the line and Stop sign could be taken as a clever addition to the project, but the reality of the matter is that I didn't have any grey felt long enough, so I had to piece it together, and that was my solution to hide my line...hehe

Which was crazy... cutting out those letters was not the easiest.

The numbers were much more fun to add... and luckily you can't see how terrible I am at sewing around them with clear thread. HA!


Anyway, I hope my lil' nephew enjoys toting his little cars in their new little cozy, and maybe it will keep him distracted for a little bit in the day. 

Craft. Me. This.

Car Cozy Tutorial found HERE.

Tuesday, December 6, 2011

Christmas Advent Calendar

This is an Advent Calendar that took TWO years to make. 
I actually didn't work on it for two years, but two Christmases ago is when I made the calendar, and was resolved to finally make my ornaments this year. 
They were time consuming to make, but oh so worth it!


Many of the ornaments are random, but they are copies of the ones I grew up with.
(mouse, ice cream cone, sheep)

When I was little I always wanted the heart to be positioned between the two ginger people.
They are after all in love. 

I always felt that the star had to be the last ornament on the tree, but my girls have already decided that they have to start placing ornaments at the top of the tree and work down.
 Doesn't the tree look so full and happy?

Now... here are some close ups of my hard work.
The color is off on some, and the details are hard to see... but you'll get the idea.
 Bell, Star, Present
Sugar Cookie (or pie...), Penguin, Snowflake 

Gingerbread Gal, Gingerbread House, Gingerbread Man 

Sheep, Heart, Black Sheep 

 Owl, Wreath, Mouse

Snowman, Santa, Angel 

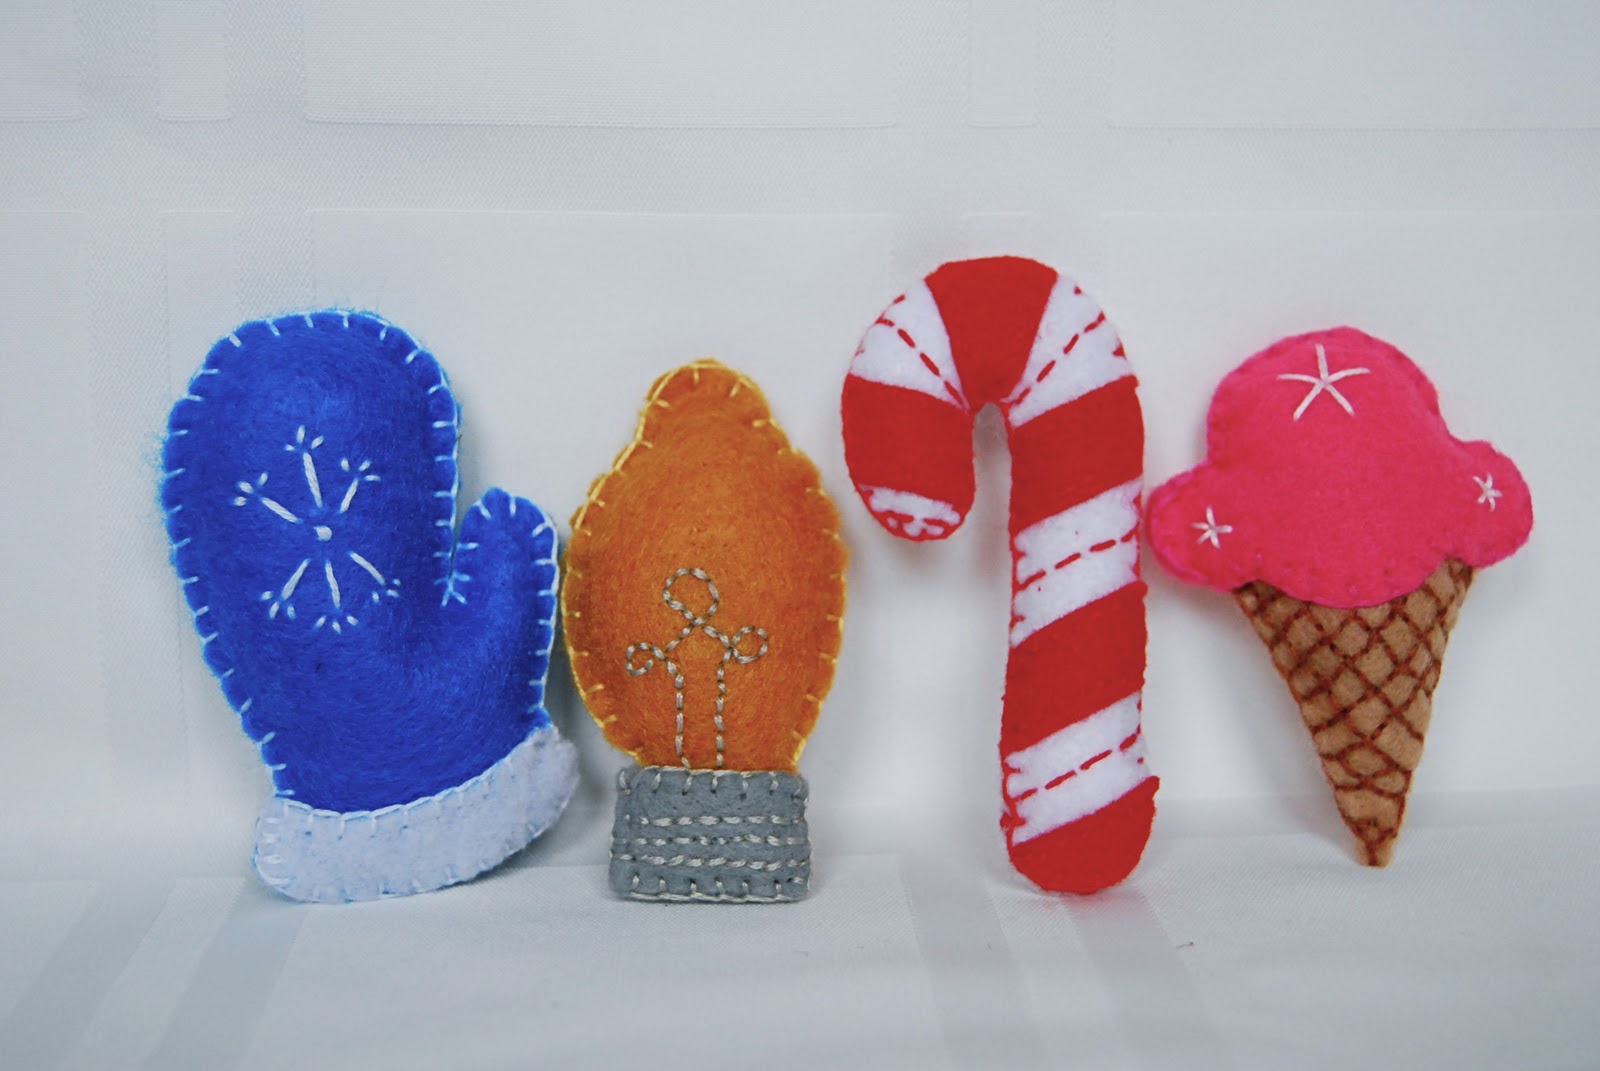
Mitten, Christmas Light, Candy Cane, Ice Cream 

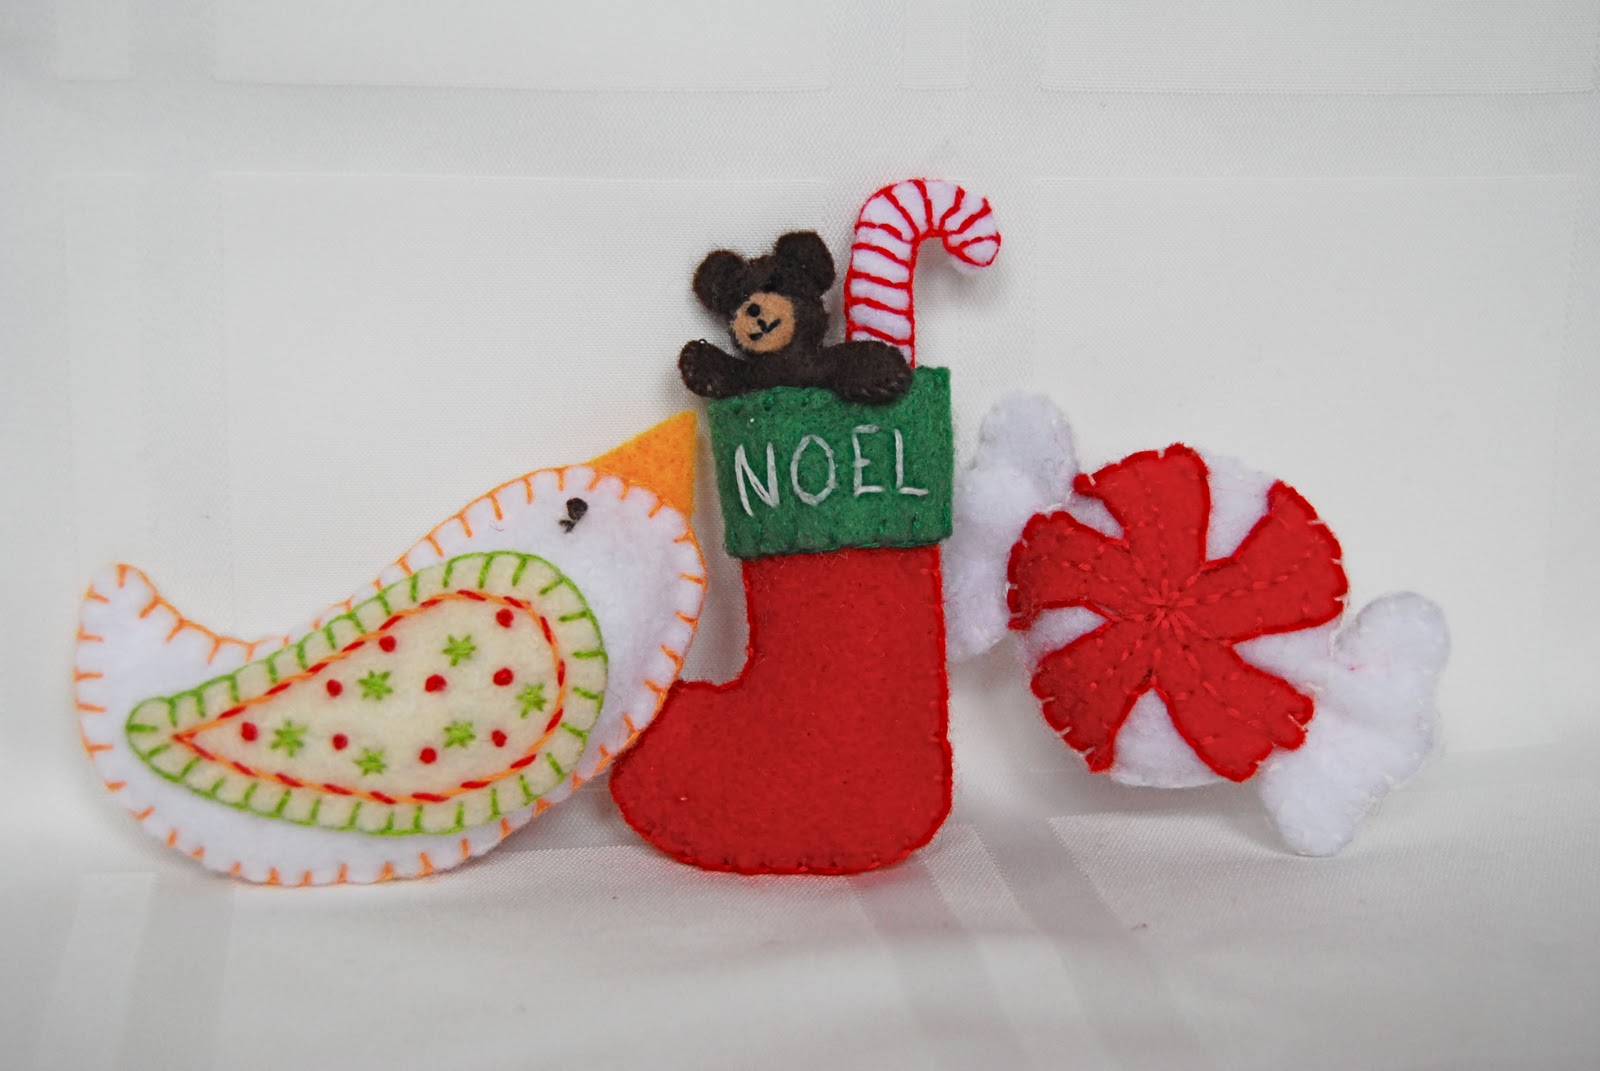
Bird, Stocking, Peppermint

Well, there you have it folks!
Really, should it have taken me a month to get these all made?
I don't know.

So... if you're feeling wildly ambitious...
Craft. Me. This!